Friday, October 5, 2012

Pattern Review- London Pants by Petite Kids Boutique

Long time no see. My work has been more demanding, my children have been more demanding, and time just not has allowed for the posting so much on the blog of late. I debated about posting this, because I had taken a step back from the bloggy world, but I decided in the end that these pants were too cute not to share with the world.

I pattern tested the London Pants pattern by Petite Kids Boutique. The pattern is so detailed. The PANTS are so detailed with pockets, buttonholes, and lots of topstitching detail. They are time consuming, but sooo worth it in the end. My daughter is skinny and pants that are store bought just do not fit her correctly. I customized the elastic to accommodate my teeny weeny waisted munchkin, and I just think they are the bee's knees. Try 'em out and you be the judge. They are listed now HERE.


Thursday, September 13, 2012

Pattern Testing - The Megan Dress

I was lucky enough to have the opportunity to pattern test another great dress pattern from Petite Kids Boutique.  This one is called the Megan Dress.  It has not been listed in shop yet, but should be as testing is nearing completion.  It will be available in sizes 12 months to 8 years.  My little angel is modeling the 18 month size and she can't be bothered to stay still for long, so my shots are limited. 


Isn't that lace up back just the cutest thing?
 

The hardest thing about this pattern would have to be the button holes and they really aren't THAT difficult.  Check out her other great patterns, too, through the link above.  You will have the best dressed girl in town.

Friday, September 7, 2012

Halloween Mummy Wreath

I don't know how many of you watch Craft Wars, but sometimes it can be incredibly inspiring.  There was an episode a handful of weeks back that had the participants make Christmas wreaths.  One of the ladies made a two layer wreath and that is where my idea for this one began.


I started with a styrofoam wreath, unfinished wood circle, unfinished wood letters, Modge Podge, craft paint, crepe paper streamers, scrapbook paper, and some decorative spiders (mine were actually brads from the scrapbook section.)

I took the scrapbook paper and modge podged it to the styrofoam wreath.  I painted my wood circle and my letters (B-O-O).  I used glow-in-the-dark paint mixed with white craft paint for my mummy eyes and flat black for my letters and the face of the mummy.  Then I coated the circle in Modge Podge and wrapped the crepe streamers around the circle to form my mummy head.  I hot glued the mummy head to the center of my wreath.  I used Modge Podge to attach my letters to the wreath, and then I hot glued some of the brads to the face of the mummy.  The other brads I stuck into the styrofoam around the wreath, and voila!  Easy Halloween wreath that is cute and not too spooky.... as my kids request.  :)


Thursday, September 6, 2012

Teacher Gift - Pencil Scarf Pattern Review

With the kids back in school they have already lovingly shared their germs and there has been a nasty cold floating around our house this week.  It has not been conducive with my crafting time unfortunately so I wanted to share with you a little scarf I crocheted a couple years ago for a teacher in our family.  This would make a great teacher gift this winter if you are in the market.

The pattern is available to members of Ravelry for free, so the yarn and your time is all it will cost you.  The pattern can be found here

The pattern is easy to follow and I think even a relative newbie to crochet could conquer this scarf.  I did, however, make a few changes to mine just for added detail.  I added ridges along the length of the pencil using front post treble crochet, and I added ribbing to the silver part near the eraser.  The recipient of the scarf loved it. 

This is the only photo I have of it on this computer, but I think you can get the idea.  :)

Saturday, September 1, 2012

Kindle Fire Giveaway 9/1-9/15


Welcome to the Kindle Fire giveaway sponsored by Bee Savy and hosted by Debbie Does Coupons.

This giveaway starts at midnight EST on 9/1 and will end at 11:59 PM EST on 9/15. One lucky winner is going to receive a Kindle Fire!
About our sponsor:
BeeSavy is a hot, new cash back shopping site that helps take the sting out of online shopping!  Check BeeSavy before doing any online shopping to find the latest coupon codes, and to actually receive cash back for your purchases!   Also, check BeeSavy often to see the HOT daily deals that they feature!

Entries are recorded in the Rafflecopter form embedded below.
Giveaway ends on September 15th at 11:59 PM EST
To be eligible to win the Grand Prize, you must be a member of BeeSavy. This will be verified upon choosing the winner.
Sign up with BeeSavy HERE.</​strong>

Good luck to all.

a Rafflecopter giveaway

Friday, August 31, 2012

Team Spirit Bandana Dress

College Football is officially underway and with today being Team Colors today I thought it was the perfect time to make this adorable little bandana dress.  If you have seen my Hanky Hem Bandana Top then you are off to a great start, because this simple little dress starts off the same way!

 
What you will need for this project
  •  2 bandanas (in team colors) - Go Tigers!
  • T-shirt
  • Grosgrain ribbon - optional

The first thing you will do is cut your bandanas in half on the diagonal so you have 4 triangles as in the picture above.
 
 
Then you need to cut off about 3-5 inches from each end corner depending on the size of your child.  I did 3 inches for my 15-month-old and it still allowed for lots of ruffle.
 
 
Now with right sides facing you will sew the short ends of like bandanas.  Ex. I did my two purple ones together, and my two Clemson print ones together.  Then finish that seam. 

For the next steps I forgot to take a picture so please do not be concerned when you see the bandanas are the wrong color.  I just used these from my bandana top tutorial to substitute.  If you need any clarification on this step you can go here.

 
Open your bandanas up and place one of them inside the other.  Line them up so that they look like the picture above and pin.


Now you will adjust your stitch length to the longest setting and put two rows of basting stitches around the top edge.  DO NOT BACKSTITCH.  There is only one in this photo, but you need two rows.  You will take the long string from the bottom side your work and knot one side so that it sets that work.  Take the long strand on the other end of your work on the bottom and pull, so that it ruffles.  If you have never done this type of gather before you can go here for more information. 


You are going to put your t-shirt inside of your skirt bottom you have been working on. The right side of your bandanas should face the right side of your shirt.  You will adjust the ruffles so that it fits the size of your shirt.  Make sure you align the side seams so that your bandana hem hangs in the right position.  Depending on the length of your t-shirt and how tall your child is you have have to add it up higher on the shirt and cut off some of the length of the shirt.  My shirt was a little long so I cut it off first.  Then when you have everything adjusted accordingly you will stitch your skirt onto your shirt.  Make sure you readjust your stitch length for this step to a shorter stitch length.  Then you need to finish that seam and trim the edges.

Now flip your skirt down and if you wish you can add a ribbon like I did just for some added detail.  Put it on your little girl and CHEER CHEER CHEER!


Wednesday, August 29, 2012

Four Eyes

Well, today I am dealing with some ghosts from my past.  Feel priveleged you get to share in this adventure, because it will probably not happen again.  I got out the photo albums yesterday trying to find some pictures of me in glasses throughout the years.  Obviously styles have changed drastically as well as my taste in eyeglasses!  And geez is that a crimped mullet I was sporting when I was 10?!?  Thanks, Mom!


Yep.  I have almost always had glasses.  I got my first pair of prescription glasses when I was in the 3rd grade and I picked out these atrocious glasses that people always thought I was wearing upside down.  I liked them because there was a little picture of a smurf on the side of the frames.  They were pink and blue.  With that said, my own son will probably be in glasses within the next two years the eye doctor said, and I hope I can let go of my own control issues and let him make his own mistakes chose his own style.  It is all a part of growing up and growing into yourself isn't it? 
 
I posted a few months back about how I had gotten new designer glasses.  If you wear glasses you know how expensive they can be.  We have since lost our vision insurance, and with 3 members of my family wearing glasses in the near future it will be increasingly important that we find more affordable options in vision correction.
 
This is one reason I was excited when I was contacted by GlassesUSA.com with a special offer for my readers.  They are offering you 15% off your entire order amount plus free shipping on orders over $50 with code FS15.  Or you can take 10% off your prescription glasses order using code Blog10.
 
They have lots of different designers labels like Coach, Guess, Calvin Klein, Giorgio Armani, Tommy Hilfiger, and Jones New York just to name a few.  You can also add any lens customization like polycarbonate lenses, antiscratch coating, bifocal, etc. that might fit your personal needs.  They also sell prescription sunglasses if you are all set for eye glasses


Sunday, August 26, 2012

Gone Fishing Party

It seems like this weekend has flown by in a flash.  We packed up on Friday and headed up to the lake where we rented a house for the weekend.  My boys have fallen in love with fishing this summer so I thought it would be neat rather than paying some place an hourly rate and per person fee for hosting the party that I would just rent a lake house and have a little family party where the kids could fish until they dropped.  Mission success.  They are completely worn out now.  Haha.

Dad and the boys checked out the dock Friday night and tested out the fishing and on Saturday afternoon family came up for hot dogs and cake, and of course the fishing fun.  I didn't get nearly the most elegant photos I had envisioned, but it was a whirlwind of a weekend.  I did a cute little banner that went right along with our fishing theme and I strung it on fishing line with Christmas ornament hooks.  This was my favorite banner I have made to date!


I made these Pinterest inspired cupcakes only I substituted coffee stirrers and Swedish fish.  You will find my pinspiration here.


I also put blue food coloring in the Sprite and made what we call the Chocolate Pudding Field of Worms and labeled it as bait.  I unfortunately did not get a picture of them :(    Here is how you make the bait buckets, though.

Chocolate Pudding Field of Worms

Ingredients
  • Roughly 30 Oreos, crushed
  • gummy worms
  • 2 (5 oz) Cook-N-Serve Jell-O chocolate pudding
  • 3 cups of milk
Basically I used 3 small plastic sand pails that were on clearance from the summer.  Fill the bottom of each of your buckets with some of the Oreos.  Then prepare your pudding according to package directions.  When the pudding is done pour it on top of the Oreos.  Next, cover with aluminum foil and refrigerated for a couple of hours.  Remove from the refrigerator and put the rest of the Oreos on top.  Then you will take gummy worms and arrange them on the top to look like they are crawling around in the dirt.  Easy peasy.

The party was a hit and the boys both agreed it was one of the best birthdays ever!


Sunday, August 19, 2012

Boys' Birthday Invites - Sneak Peak

My boys have birthdays that are one month apart.  Sometimes we decide to combine their parties into one shindig and meet in the middle.  This year is one of those years.  School starts back this week (on my oldest son's birthday as a matter of fact,) and my boys have been hugely fascinated with going fishing this summer, so in order to change it up this year we are renting a lake house somewhat locally and having family up for a little birthday dinner.  The boys have been allowed 2 friends a piece to come fishing with them for the day.

Today I sat down with my Silhouette to finally get the invites finished since the party is next week.  I am seriously not into waiting to the last minute like this, but there were a few issues getting the reservations nailed down, so everyone was given a tentative date for the party and now that it is confirmed the invites will be delivered (some by hand.) 

This is a little sneak peak at what you might expect from their party.  I'll post pics sometime next week of some of the other details. 

I hate wasting paper, especially cardstock, so I mixed up the invites and used the cut outs, and the negatives of the design for the cards.


The back of the envelopes.  Every invite has a different fish (and what is fun is they are all fish that my kids can identify as fish they have caught or have seen someone catch.)

Sunday Social - Kickin' it Old School

I will preface this by saying I do not have any of my better middle/high school pics available to me at the moment, or you would not be getting eyes closed blurry shots haha... but it is what it is.  Enjoy at my expense I suppose :)


Sunday Social

1. What were you like in Middle/High School?
I was a shy kid in Middle School especially. I think middle school is always the awkward years where you are still finding your place and I was no different. I had the same group of friends all through school and even to this day, so I'm nothing if not loyal. :) I was a "band geek" although I never really saw us as a typical group of "band geeks" like they portray on television. (We get a bad rap. haha) I was an honors student, and member of the academic team, and me and my husband were runners up for prom king and queen, so how is that for diverse.

2. What were your favorite past times?
Well, I am a musician at heart. I always loved performing, even to this day really. I liked hanging out with my friends of course. I also really liked being with my church youth group. We had so much fun and it was nice to feel like you had support when things weren't going quite like you hoped.

Picture from a youth group trip to the zoo.  Yep, looked like a goob with big hair.  I'm the one with my eyes closed.  Unfortunately my hair was bigger than this sometimes.  :-/


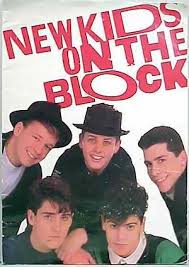
3. What songs were you obsessed with? Oh, oh, oh, oh, oh. The right stuff. Umm, Middle School days it was definitely New Kids On The Block.... Any of it. I didn't get to go to the concert in sixth grade, so I went with a bunch of my girlfriends to their reunion concert a couple of years ago. We had a blast dressing 80s and screaming like a bunch of swooning teenagers. We laughed so hard.  I think I had a t-shirt with this picture on it.


And here is a very blurry picture of me looking like a goob in my Joey Joe t-shirt.  I must have been in about the 6th grade here.  Very hard years on the ego.  haha 


4. What fashion statement do you look back on and cringe?  Big hairsprayed hair for sure, hammer pants, banana clips, 2 pairs of socks all the time... I really can't hang with some of the neon colors anymore either.
5. What were your favorite TV shows/ Movies?
Teen Witch, Dirty Dancing, Can't Buy Me Love, Adventures in Babysitting, and eventually The Cutting Edge

I also eventually became somewhat of a Treky.  I had a crush on the young Wil Wheaton.

 
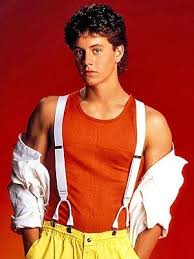
Growing Pains... Kirk Cameron


Yeah.... Ok, so I fit the term geek looking at all my answers here haha, and I still would if I were growing up now, only now my answers would read Harry Potter and The Hunger Games with a side of The Avengers, Smallville, and Buffy the Vampire Slayer.   Haha.  But I know what I like and that is ok with me.


Friday, August 17, 2012

Awesome Deal Alert

I don't know if you got a chance to see this awesome project by The Meaningful Mama a few months back, but she made interchangable blocks of her kids in different outfits.  I just love it.  How cute are they??


Today you can get the blocks on sale at Pick Your Plum, so now is your chance to make the awesomeness for even cheaper.  These deals go fast, so hurry and get yours!

Sunday, August 12, 2012

Sunday Social

I haven't done any of these kinds of posts before, but I figured what the heck. You might want to know a little more about me... you might not, and that is okay. Might be fun to give this a shot, though.

Sunday Social


1. If you could only eat one thing for the rest of your life, what would it be?
Quite frankly I'm not sure there is just one food that I could eat for the rest of my life, but I'm sure if I did it would be junk... I have a terrible sweet tooth and other than that I like biscuits, and pizza (read as:  Still junk)!  I have to watch my middle son, because he got this from me!
2. What's your guilty pleasure/comfort food?
I do love chocolate... I guess I will go with brownies.  I don't even care if they are the Little Debbie prepackaged variety.  You know the ones I'm talking about.
3. What's the weirdest/craziest thing you've ever eaten?
I don't have a very adventurous pallate.  It would probably be some weird food concoction me and my sister and cousins dared each other to mix up in the kitchen as kids. 
4. What foods do you avoid at all costs?
I don't really care for seafood.  About the only thing I will eat is shrimp.  I also really hate sour cream!  Oh, and cabbage... think stuffed cabbage.  GAG.

5. What meal reminds you of your childhood?
Anything I ate at my Grandma's while my parents were working.  Saltine crackers with mayonnaise or peanut butter.  (I know the mayo sounds gross haha)  My grandma's grilled cheese sandwiches.  Biscuits with butter and honey.  Oddly enough chicken livers and poke salad.... (yeah, I don't eat that now either.)  Nutter bars and an ice tea on her front porch.  Man, I miss her!
6. Share one of your favorite recipes and the story behind it.
Crescent Chicken
(serves 6-8 rolls)
1 (8 or 6 jumbo count) package refrigerator crescent rolls
2 cups chopped cooked chicken
8 oz. shredded medium sharp cheddar cheese
1 can cream of chicken soup
1 can of milk (using soup can)
Preheat oven to 350
Prepare soup using milk and set aside. Separate crescent rolls. Spoon chicken and cheese onto each crescent; roll and seal to enclose filling. Place in a 9×13 baking dish. Pour soup over rolls. Sprinkle with left over cheese.  Bake at 350 uncovered for 30 mins.
Sorry I don't have any pics, but this is kind of a last minute decision to post.  Good chance this will be on our menu for tomorrow and if so I'll link it up on my recipe page in a separate post.  :)  I got this recipe from my sister when I was trying to make a recipe book for a newly wed gift for my sister-in-law.  She did not part with this easily and still gives me the evil eye when I talk about cooking it.

Saturday, August 11, 2012

School Bus Mailbox Cover

After the stomach bug from Hades and daily thunderstorms that have prevented good photos or internet at times I finally have another project for you.  School starts back here in 10 short days!  This summer has flown by and I am sad to see it go.  I hate to see the kids go back.  No matter how much kicking and screaming and resisting the end of the summer, though, it is still going to come, so I decided that I would add a little back to school jazz to my house.  There really is nothing else coming up until Halloween, and this cute little school bus idea just came to mind.  It is a super easy project that really requires little to no sewing.  So without further ado, I present the school bus mailbox cover.  :)


Measure your mailbox to get the right amount of fabric of course.

Materials:
  •  Yellow and black fabric (I used cheap broad cloth), and scraps of red and white.
  •  Heat n Bond iron-on vinyl
  •  Regular fabric Heat n Bond or Wonder Under.
  •  sticky back Velcro
I did not take pictures of all the steps because it is really so simple.  You just need to have the measurements of your mailbox at hand.  Make a template for the square windows, stop sign, and for the round circles that will be your wheels.  Using a template will insure they are all equal size. 

You are going to start by cutting from the yellow fabric a piece that is long enough and wide enough to cover your mailbox.  Then you will just cut out all the pieces and using the regular Heat n Bond iron them onto your yellow fabric.  Remember you want to make the bus show up on both sides of the mailbox so you will have to add the cut outs to both ends of your fabric.  I did not sew the pieces down because it will be sandwiched between vinyl and not washed so unraveling should not be a big problem.  Save the wheels for later.

Then you will take the vinyl and following the directions on the package you will apply it to the front and back side of your fabric.  Then you will cut out two strips that will serve as your straps to Velcro the cover onto your mailbox.  I used the yellow fabric for this.  Then I laminated it with the vinyl as well.  I sewed one end of each of the straps onto one side of the cover (right side to right side).  Then I sewed on the wheels on that side.  Only sew the top part of the tire down, because you do not want it to wrap underneath the mailbox with your strap.  You will then sew the other tires to the other end of your strap.  Then you will put it on your mailbox and apply your sticky back Velcro.  NOTE:  You will need to at some point cut out a place for the flag on your mailbox.  I did this after everything was applied. 

This is where my Velcro straps attached.


I love how from a distance it just looks like a bus cut out, and you can't even tell there is black fabric there.  Best of all you can just wipe the surface clean, too.

Linked up over at the CSI Project for their Back-to-School Project Contest
Visit thecsiproject.com