Saturday, July 28, 2012

Paper Airplane Races

Do you remember flying paper airplanes as a kid?  Folding them different ways and seeing who could come up with the best airplane?  Well, me and the boys checked out a book from the library that taught us the physics behind the fun.  Today we thought we would have a little paper airplane experiment and learn the different ways that lift, thrust, drag, and gravity effect the flight of the airplane.  Of course they don't remember them quite in those terms, but they did learn what makes the airplane go higher or nose dive, what makes it loop and what makes it go straight.  Elementary physics - check. :)

Just in case you can't remember how to fold a paper airplane here is a little refresher in pictures.  I think I missed one step in the pictures, but hopefully this will get you on track so you can have your own paper airplane physics lesson fun.

Note, the pilot in my son's plane?  They also learned about how far he could fly before autoeject takes place.  :)

We made our planes out of heavy duty cardstock because we wanted to anticipate the nose dives and hopefully save the plane for a little while.  After doing several run throughs with the plane folded like the above pictures we made a few modifications including adding a paperclip and trying it closer to the nose versus middle versus rear; folding up the sides of the wings; and cutting slits in the back.  We tried the rear slits folded up and folded down for different effects.


Cheap, easy, educational fun at its best.


**Dragonfly Designs Giveaway ends 8/2!  Don't miss out.**

Wednesday, July 25, 2012

Super Mario Matchup Game With Free Printable


I'm not really sure how this idea came to me at this point.  Somehow in the midst of redoing the boys' room in a Super Mario theme this game idea just popped up, and the next thing you know I am working on it at my kitchen table.  It is a little twist on the old game, Memory, we all played as a child.  The only real difference aside from the pictures is that if you get one of the "bad guy" cards you lose a turn.


If you would like to make your own Super Mario Matchup Game this is what you will need:
  • foam board
  • printer & paper
  • craft knife such as Xacto and scissors
  • decoupaging medium like Modge Podge
  • Mario Game Printable
The first thing you need to do is print out the free printable from the link above.  Then you are going to cut all of the images out into squares roughly the size of the question mark boxes.  Next you need to use your craft knife to cut out your squares from the foam board.  If the edges are rough you can use your scissors to straighten them some.

Now you will glue all of the question mark boxes onto one side of all of those squares.  I believe there are 18 pairs in all.  The character squares will go on the opposite side of all of these squares so each one is two-sided.  Set up an assembly line and enlist your children to help cut out the squares (using safety scissors) and glue the paper to the squares.  Crafting knives are extremely sharp, so I would advise you do that part, though.  When all of the squares have had a chance to dry you will put a top coat of your decoupaging medium onto both sides of the squares (letting one side dry before coating the second side.)  The red color tends to bleed some so make sure to only do one light coat across it.

When they have all dried it is time for your kids to have fun!  And they aren't even glued to a video game, woohoo!


P.S.  Don't forget to check out our giveaway for some awesome handcrafted jewelry!  Entries end August 2!

Tuesday, July 24, 2012

Dragonfly Designs Giveaway!!

I am so excited to be hosting my first giveaway here on Pocketful of Dreams!  We have been growing by leaps and bounds and to thank you, my friend, Sonya at Dragonfly Designs is giving away a $25 gift certificate for your choice of jewelry from her shop! 

Dragonfly Designs is a new and rapidly growing jewelry shop that features unique, earth-inspired, handcrafted jewelry. Each piece is constructed with glass beads, high quality hooks/clasps, and thicker wiring, making their products virtually unbreakable.

Their inventory is growing daily.  Here are just a few of the options they have offered recently.


And that is not all, if you are not the lucky winner, Dragonfly Designs offers 10% off just for liking their Facebook page!  Good luck!!

a Rafflecopter giveaway

Sunday, July 22, 2012

When Life Gives You Lemons

As some of you may have noticed I have recently added to my etsy shop.  I have been doing etched glass mirrors and such, and started doing some tree of life stuff for custom orders.  Well, I had several custom orders come in this week, and one of the mirrors was giving me a particularly large amount of trouble.  No matter what I did the thing just did not want to etch properly.  I was not very pleased with the way it turned out so I set it aside.  I somehow resisted the urge to chunk it in the garbage despite my extreme frustration at that point.  After completing another tree of life (which turned out beautifully I might add) and after letting the mirror sit for two days, I looked at it in a little different light.  Go ahead and cue the spot lights and the angel singing in the background, because I had an idea.  Shocking.  I decided rather than waste this I would just paint the frame with the off white paint I used for the Super Mario TV Stand.  Add a little scrapbook paper, and turn it into something completely different.

This is what the mirror frame looked like before...


Pretty enough in its own right, but why not capitolize on my own misfortunate.  In this case, when life gives you lemons..... make extremely early Christmas decorations. 


Some time later remind me to tell you about how God spoke to me through this incident and how I learned a little bit more about myself in the process.  In the meantime, though, I think it turned out pretty cute don't you?  What do you do when you have majorly frustrating craft disasters? 


Friday, July 20, 2012

Bird Feeders

I signed the kids up for summer reading at our library and during our weekly library trip I decided to pick up a book on birds that are indigenous to our area.  It's just a simple field guide with lots of pictures to help you identify what you are seeing.  We have the most excellent vantage point to see the birds as our kitchen sits high up and there are trees right outside our sitting area window.  We have seen so many kinds of birds living here that I had never even noticed before, so I decided the kids might like to make some little bird feeders to hang on the limbs right outside our window and watch for the birds.  (Yes, I do know it is the wrong season technically for bird feeders.)  I thought it would be neat to do this project twice a year to see the different types of birds we get during warm and cold weather.  The field guide also tells us which birds are year round, migratory, summer, or winter birds for our area.

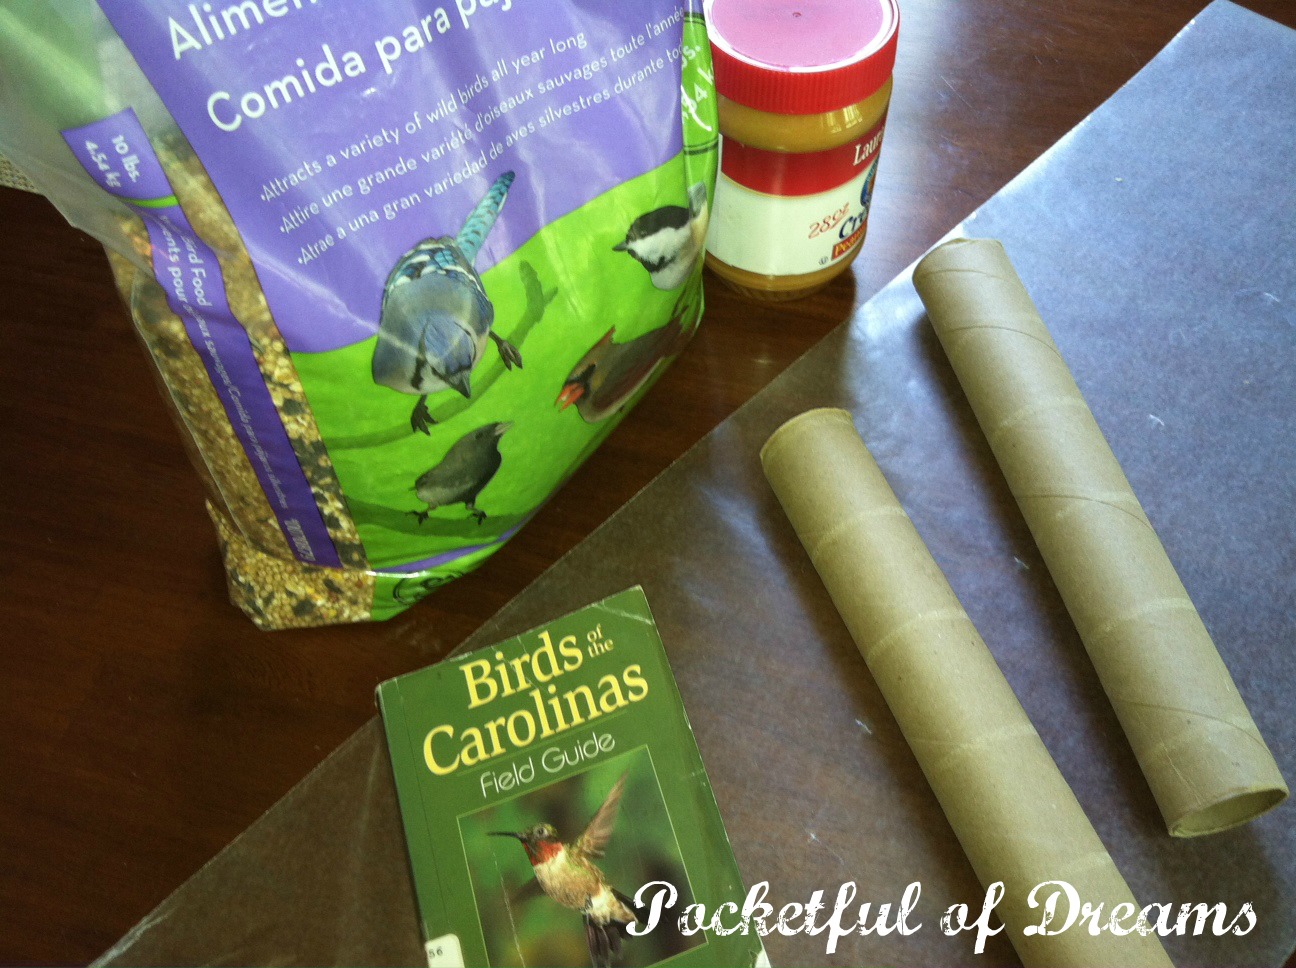
All you need is:
  • an empty toilet paper or paper towel roll tube
  • peanut butter
  • bird seed
  • field guide for local birds


Coat the paper towel roll tubes with peanut butter all the way around.


Then roll the coated tube in bird seed or mash the seeds into the peanut butter.


Now just find a nice viewing area and keep your book in that area.


See how good that view is??  Unfortunately, we still have yet to see any birds feeding.  We have had bad thunderstorms every night this week and it started pouring about an hour after we put our feeders up.  They are still up, but they haven't been needing as much to eat I'm sure as the worms are probably plentiful with this wet weather.  This may not be the best time of year in retrospect, but I think my middle child is learning a lesson in patience from this.  He has probably been the most excited of the kids about seeing the birds, too.

The birds finally came.  This is a tufted titmouse.  Bet you never heard of that before.  ;)